Saturday, 31 March 2012

Just a Bunch of Softies...

Well, soft on the bum that is!!!! It's been an interesting week here for us as a family, we have decided to make a big switch to using cloth diapers!


I have been researching for quite a while now to see what kind I want and have been asking all the fellow CDing mammas I know a million questions! I'm quite pleased so far. We have gone with Fuzzibunz and BumGenius. I don't know yet which I prefer because they are both wonderful :)

Look how pretty they are:


No, I didn't just switch because they are cute… it's just an added bonus…


* * * P.S. * * *

I'd like to note that I use the term "research" much more freely than I used to… Funny how my standards have changed from reading scholarly articles for hours in the MSVU library to simply reading up on Babycenter! haha

Friday, 30 March 2012

Boogie Blankies

Sniffle season is in high gear around our house. Poor little baby noses are so sensitive, no matter how soft the tissue! Morgan has a hard time letting us wipe her nose with a tissue, so I've been using any means necessary to wipe the gook off, her socks (that have fallen off), her blankies, her sweaters… even her stuffed animals! She loves when I use something super soft!

This got me thinking, why not make re-useable tissues for baby? I used the most adorable Precious Moments fleece that I bought a while back and have not been able to use yet. All I did so far is cute them into squares and stick them into an empty wipes box. They seem to be pretty good so far!


The only thing I might do, if I ever work up the energy or have the time, is sew a zig zag stitch around the edges. Not sure if I need to or not… after all, they are just for baby's runny nose!


Here she is checking them out, you can't really tell but she was very interested!

Thursday, 29 March 2012

How to Spoon Feed a Baby

This task requires the reflexes of a cat and the stealth of a ninja. Proceed to tutorial if you meet these standards.


1. Place happy/hungry baby in highchair. Yes, hungry… she will want to eat, right?

2. Put food on spoon. Yum, looks good so far!

3. Fly food to baby's mouth a la airplane or your goofy tactic of choice.

4. Baby shuts mouth. No, LOCKS mouth shut. No mommy, no daddy... no food.

5. Try again.

6. No luck.

7. Wait for baby to smile and laugh. Use your rapid speed to stick spoon in.

8. No luck. She's much faster. (And, perhaps smarter?)

9. Repeat steps 2-8.

10. No luck. (Yes, she's definitely smarter.)

11. Surrender!! Pass spoon and food to baby. She wins :)

Maybe you have an easy to feed baby out there, but this is our routine for pretty much 99% of the time if we try to feed her! What an independent lady we have… go girl! This is one of the reasons why we do BLW: that girl can chomp a pork chop, suck every last bit from an asparagus, and devour an avocado… but spoon? No spoon. No luck.


:) :)
Happy Eating Everyone!

Monday, 26 March 2012

Sexy Cake!

Wow, time has been flying by! I can't believe I let so much time go by since last post... Hubby was away for a week and I was super busy! Props to all the single mommas out there, much respect!

So I had my first night out since babe was born, it was my friend's bachelorette and it was soooo much fun! I was home by 12 (very Cinderella of me!) and had no drinks... But it was great!

I made this lingerie cake for the party, I think it turned out pretty good :) Definitely my sexiest cake ever.

Thursday, 15 March 2012

Clothes Pin Holder

With all the nice sunny days we have been having lately, I have been getting very excited for spring! I was able to hang the clothes on the line a few times in the last 2 weeks.


I have always just kept my pins in a cute wicker basket on the deck. However, it's not uncommon for me to spend the first 5 minutes of laundry-hanging-time searching around the lawn for the pins that have blown out of the basket. Why have I waited this long to find a better spot for them?


So I made… a super cute Clothes Pin Holder. (Yes, another easy project. You may start to see a theme, I don't have time to invest in long-term projects!)


No, this is not a proper tutorial. I can hardly remember how I did it, and I forgot to take pics!


You will need: a shirt, scissors, sewing machine, thread


Step One: Find a fun shirt to use. I used one of my sisters shirts… I highly recommend this!


… haha, Okay actually it was a hand me down, it just never fit right but I love the colour/pattern … 


Step Two: Find the size of the bag you want to create and cut through both sides of the shirt, using the neck hole as the top/centre of the bag. Do not cut any of the top on either side of the neck hole, this is going to stayed sewn. (This is where I really did no measuring… all just guessing and eyeing)


Step Three: Flip inside out. Sew all three sides cut. I double stitched, 1/4 inch and 1/8 inch seam.


Step Four: Flip rightside out. Use your scissor tips to push out the corners.


Step Five: Find a hanger, I used a baby hanger :)

Step Six: I sewed little loop holders to help it stay on the hanger. I was worried it wouldn't hold up in the wind without them.

Not sure how to describe what I did. I cut 2 little strips, folded them in half, sewed along the edge, flipped them inside out, and sewed them in as loops. No, I  have no idea what the measurements are! The loops are lined up with the notches in the hanger, so it won't fall off or blow away!


Step Seven: Fill with clothes pins and hang on the deck :) :)


Step Eight: Wait for another sunny day… 


No, this project didn't turn out perfect and there was a lot of guess work in it, but it's not hard… you will figure it out. If I can, anyone can!

Wednesday, 14 March 2012

Sensory Bottle

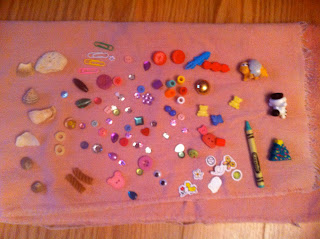
One thing I absolutely love for kids is sensory play. I have so many ideas that I am just itching to let Morgan try! Today I made a sensory 'treasure' bottle.


Last night I went on a hunt around the house to find special objects to put inside. I tried to get a variety of textures, foods, colours and natural things. I had so fun choosing what to put inside! I also washed out the bottles and let them dry overnight.


Early this morning I put them all in the bottle and filled it with rice! Another SUPER easy project :)


At first I put too many objects in and it was a little too busy for me! I took out a lot of the bigger ones. It was much better after that!


I was trying to decide how to keep the top secured and my sister Maggie gave me this great suggestion: I hot glued around the mouth of the bottle and then screwed the top on… voila! Not only fun, but safe too!


For older kids, it would be great to use as an I-Spy game… but for now Morgan is enjoying it as a shaker. Just as well!


We had two surprise visitors for the morning (yay!), so the big girls got to try them out as well. Louise loved playing I-Spy, and Silvia enjoyed looking at all the colours and shapes hiding inside!


Lucky for the girls… I made an extra one for them to keep!


What a busy morning this turned out to be! Glad the girls came by to test out the bottle, I think they are big-kid approved! (And yes, I consider a toddler and a preschooler 'big kids' at this point!)

Have a GREAT day!

Monday, 12 March 2012

Baby Legs Recap!

Last week I mentioned that I made a pair of baby leggings for Morgan. I could easily indulge myself and buy a million pairs of these for my little love bug, but I haven't been able to bring myself to pay $15 for each set!


I decided to make some and it honestly took me 20 minutes to make 2 pairs. (I made a matching pair for my sweet niece, Silvia). I followed a few different sets of directions that I had found through Pinterest and I think they turned out alright :)


You will need: Socks, Scissors, Thread, and Sewing Machine


Step One: Buy a pair of socks. Should have been knee socks, but this was all they had. Luckily Morgan's legs are still super short :) These were only $2 at WalMart… can't beat that for a trial run!


Step Two: Cut off heel and toe.


Step Three: Take the piece from between the foot and heel. Fold it inside itself. I'm going to call this piece a tube.


Step Four: Slide the remaining piece inside the new tube. Make sure to line up the unfinished edges.


 Step Five: Sew 1/4 inch all the way around, through all 3 layers. I chose to do this twice around, just to be sure!


Step Six: After sewing, flip the tube portion right side out.


 Step Seven: Find a cute baby to use as a model!


What a fun project this was! Can't wait to make more. I am thinking about making some funky non-matching ones out of all the stray socks I have not been able to bring myself to throw out!

Thursday, 8 March 2012

The Jam-Packed Day

Well, I just wrote the longest post possible, and somehow I deleted it! grr…


Repeat: do not get upset, do not get upset… It's a learning curve here in blog-land for me :)


I had a play by play of my day with funny antics that happened at each thing. Instead of re-writing what I had, I will just make a list to highlight how busy I felt today:


Chiropractor, Wal Mart, Fitness class, Sew baby leggings, convince Morgan to eat lunch, hang laundry, play with M on the deck (& take ridiculously cute pics), hour long walk, nurse on the deck/play outside, more laundry, try to convince M to have a nap, fight the nap, strap on Ergo and success for momma --> she had a nap!, go to Mom's for dinner with Mag and the girls, come home for M's bath, put her to sleep, watch Idol, look at house plans (!!!!!!!!), make cheese fries for a snack (yup, totally flaked on the diet tonight)


So, what I should be doing is going to sleep. But here I am. Silly me.


The last thing I want to do tonight before heading to dreamland is try and figure out how to post pictures. Here are a few moments from the day with my favourite girl <3


                                               Enjoying Lunch
                                     Playing on the Deck
                                 Modelling her New Leggings


Have I mentioned that I have the cutest model in the world? (I also just noticed how many times I changed her outfit today)

Tuesday, 6 March 2012

The First Post

Well, I just wrote the longest post possible, and somehow I deleted it! grr…


Repeat: do not get upset, do not get upset… It's a learning curve here in blog-land for me :)


I had a play by play of my day with funny antics that happened at each thing. Instead of re-writing what I had, I will just make a list to highlight how busy I felt today:


Chiropractor, Wal Mart, Fitness class, Sew baby leggings, convince Morgan to eat lunch, hang laundry, play with M on the deck (& take ridiculously cute pics), hour long walk, nurse on the deck/play outside, more laundry, try to convince M to have a nap, fight the nap, strap on Ergo and success for momma --> she had a nap!, go to Mom's for dinner with Mag and the girls, come home for M's bath, put her to sleep, watch Idol, look at house plans (!!!!!!!!), make cheese fries for a snack (yup, totally flaked on the diet tonight)


So, what I should be doing is going to sleep. But here I am. Silly me.


The last thing I want to do tonight before heading to dreamland is try and figure out how to post pictures. Here are a few moments from the day with my favourite girl <3


                                               Enjoying Lunch
                                     Playing on the Deck
                                 Modelling her New Leggings


Have I mentioned that I have the cutest model in the world? (I also just noticed how many times I changed her outfit today)